Creating Requirements
Introduction
The best place to create, updated and delete requirements is in the requirements tab of the requirements view.
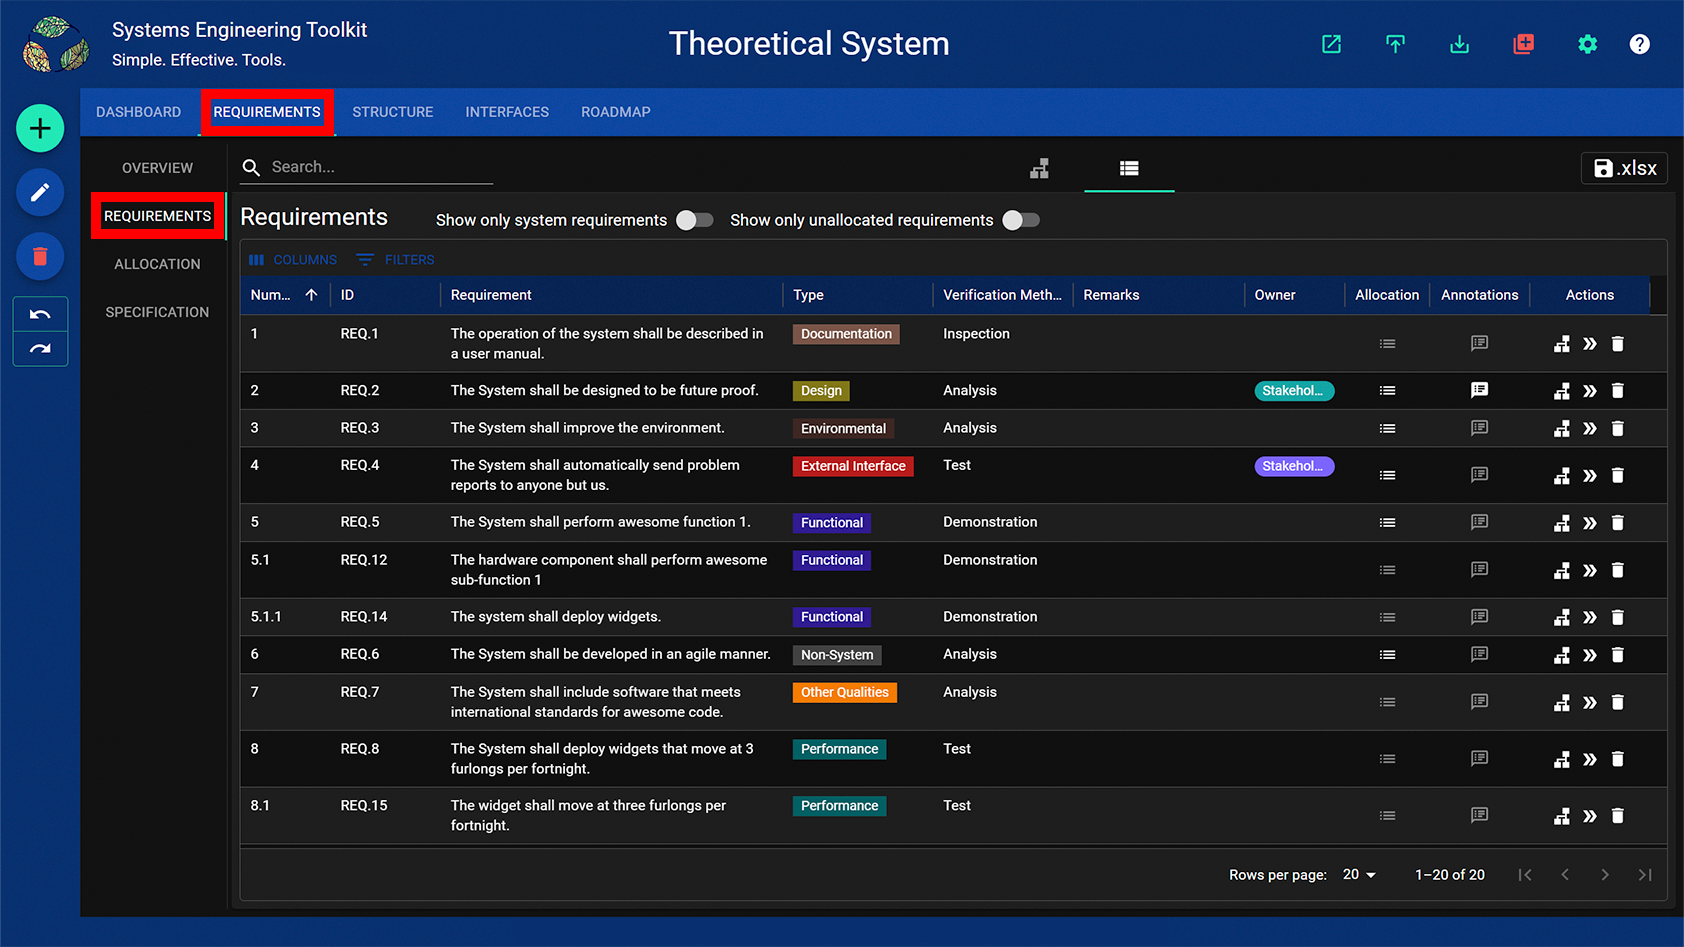
There are three ways to create new requirements.
- From scratch
- Copying from text
- Importing from Excel
Creating requirements from scratch
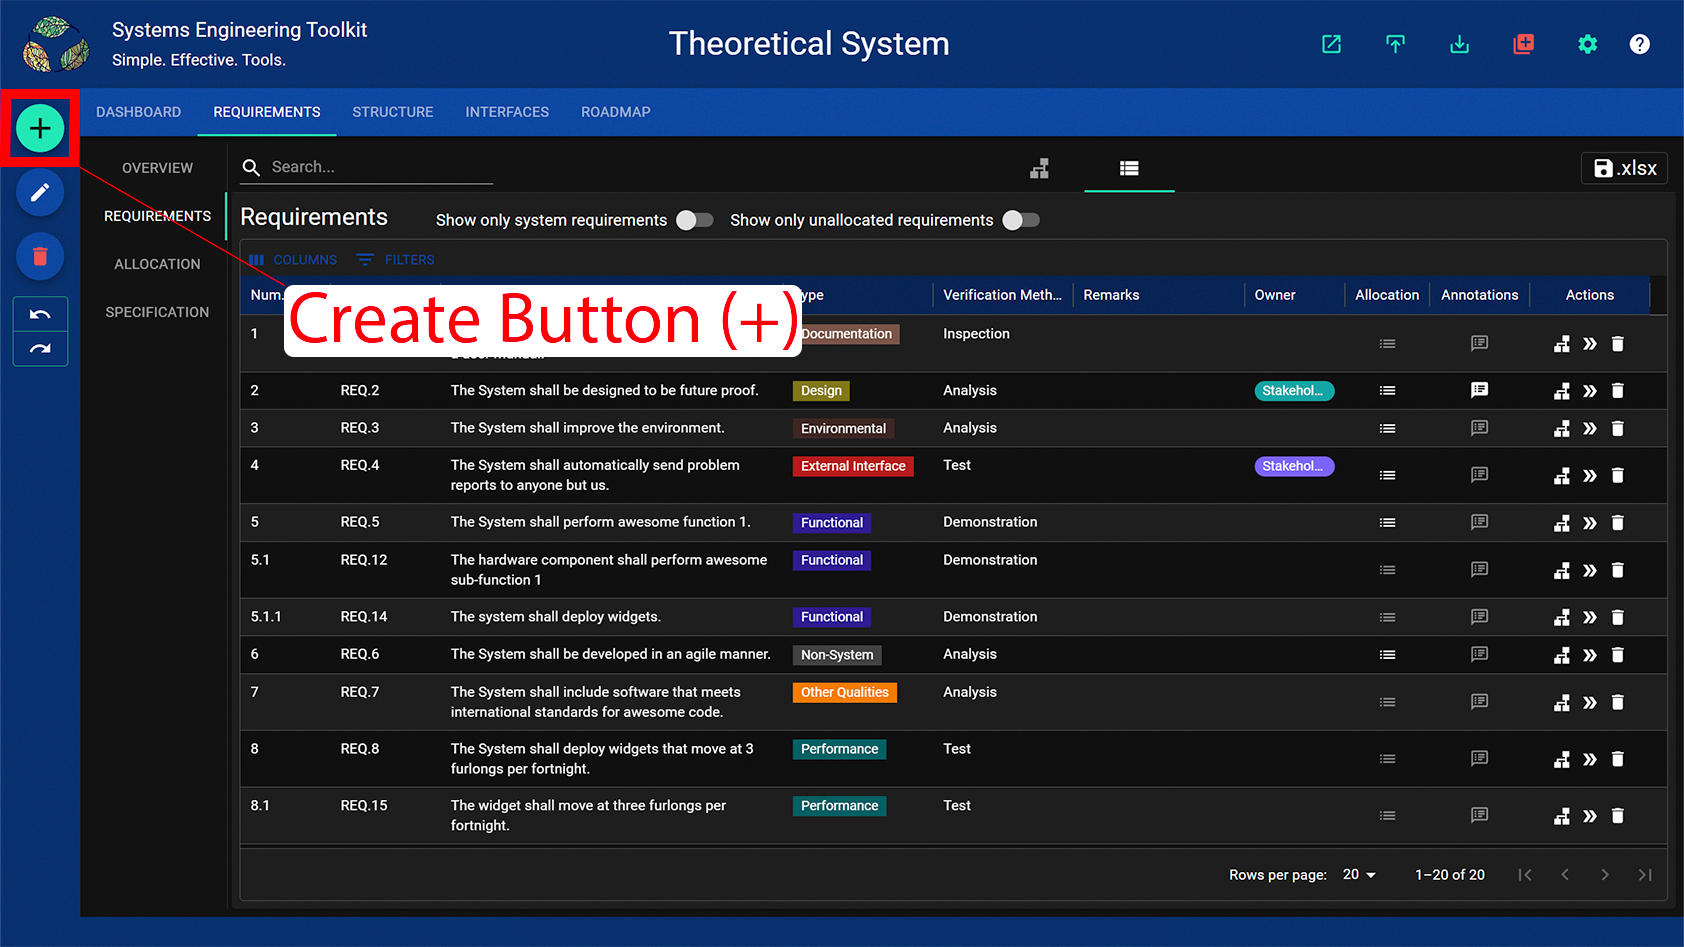
Press the create button or + on the keyboard.
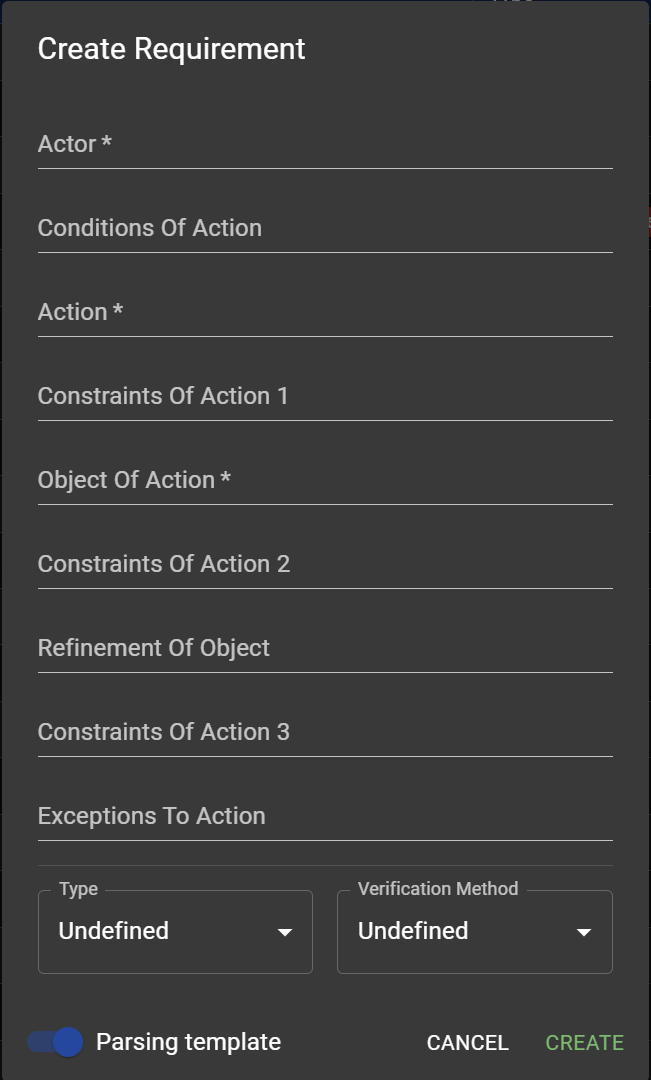
A dialog will pop up asking you to enter the new requirement, its type and verification method.
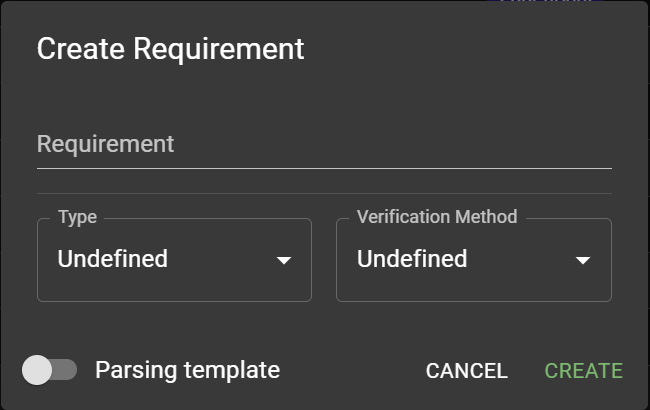
Activating the “Parsing template” switch expands the dialog to show the requirements parsing template presented in reference [1].
Copying requirements from text
Requirements can be created by copying the text from another document (e.g. a pdf or a word document). The text can either be pasted into the dialog described above, or into a spreadsheet and then imported as described below. This is the recommended method for extracting and analysing requirements from a document one at a time.
Importing requirements from a spreadsheet
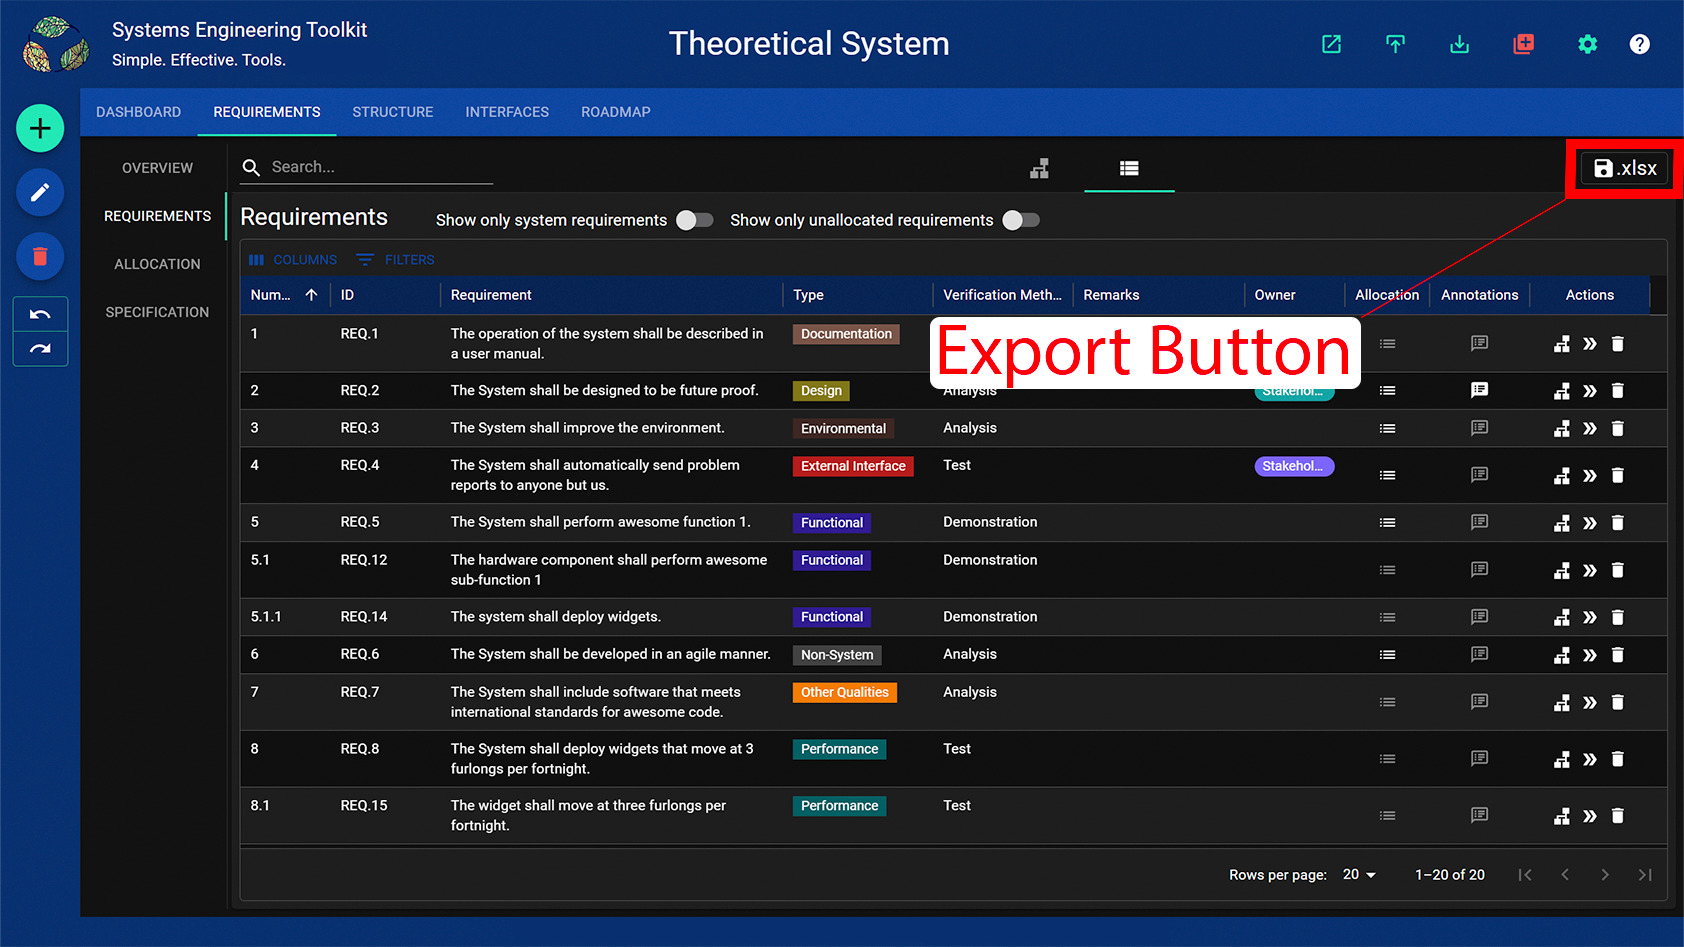
- Export the current requirements to a spreadhseet in order to create an import template.
- Insert requirements into the template sheet and set the requirement IDs as desired.
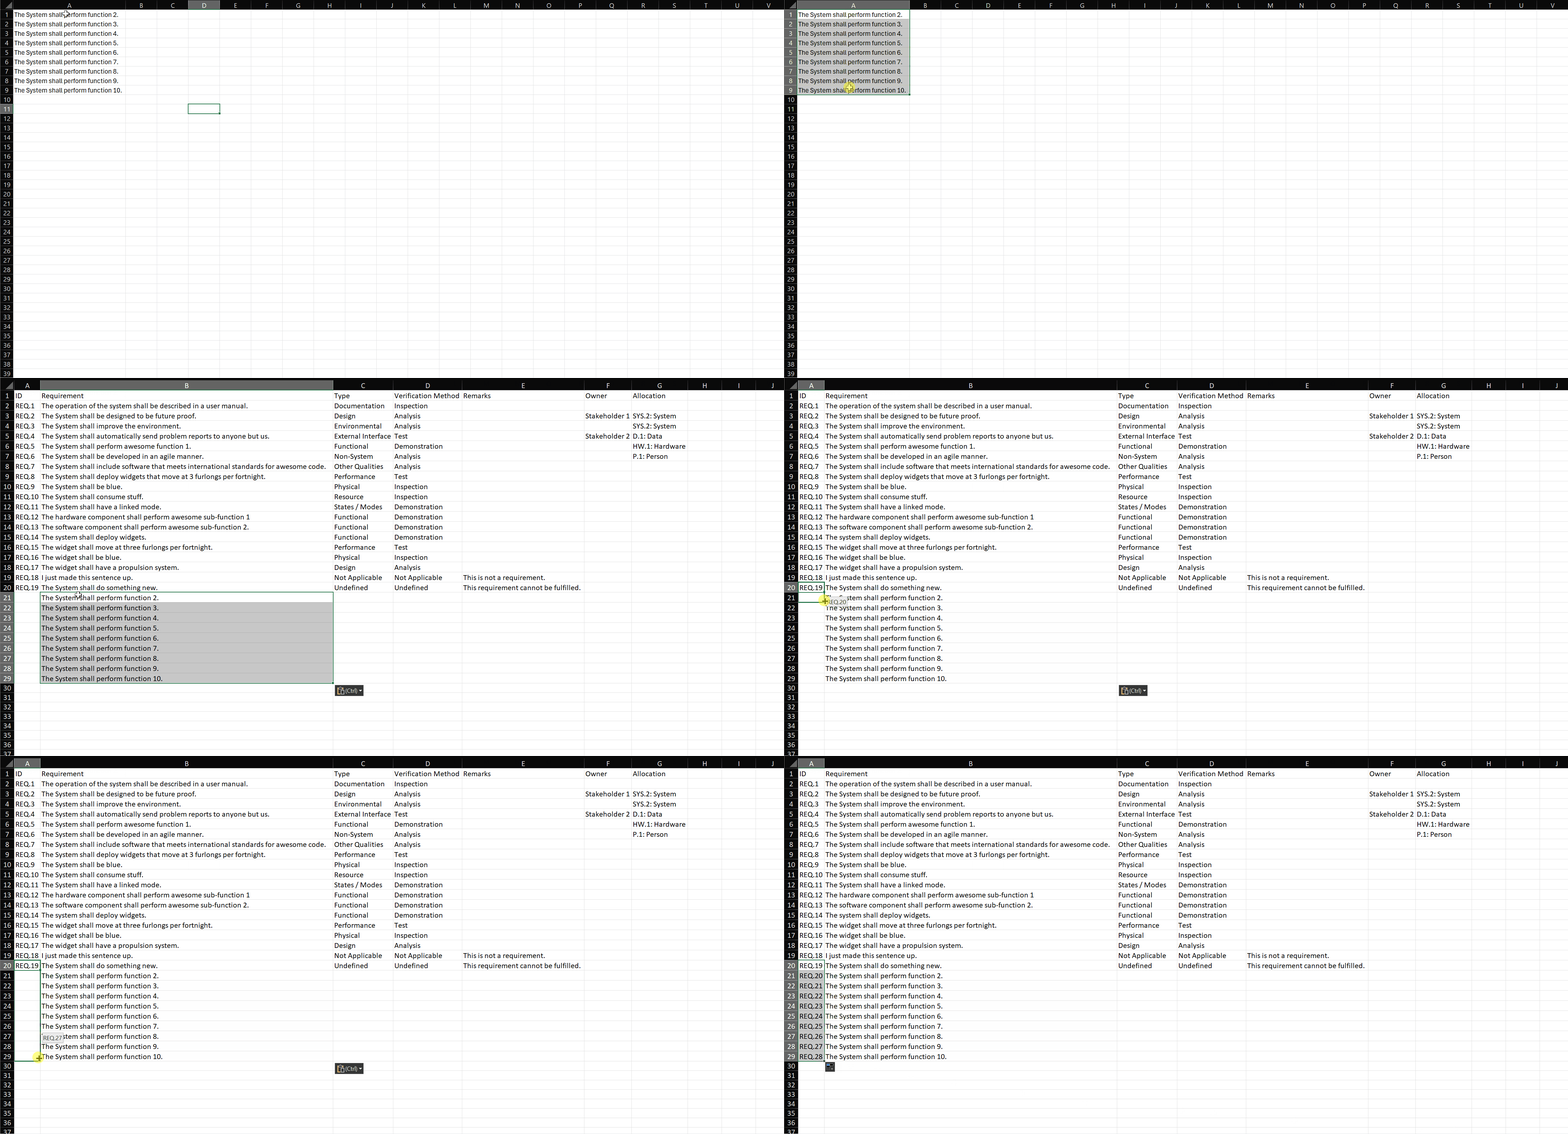
Importing from a spreadsheet will update requirements that already exist in the model.
- Set the type & verification methods if desired. They will both default to “Undefined” if left blank.
Spreadsheets are a good way to update requirements in bulk, for example, by setting the type and/or verification methods of many requirements at once using Excel’s drag formula feature.
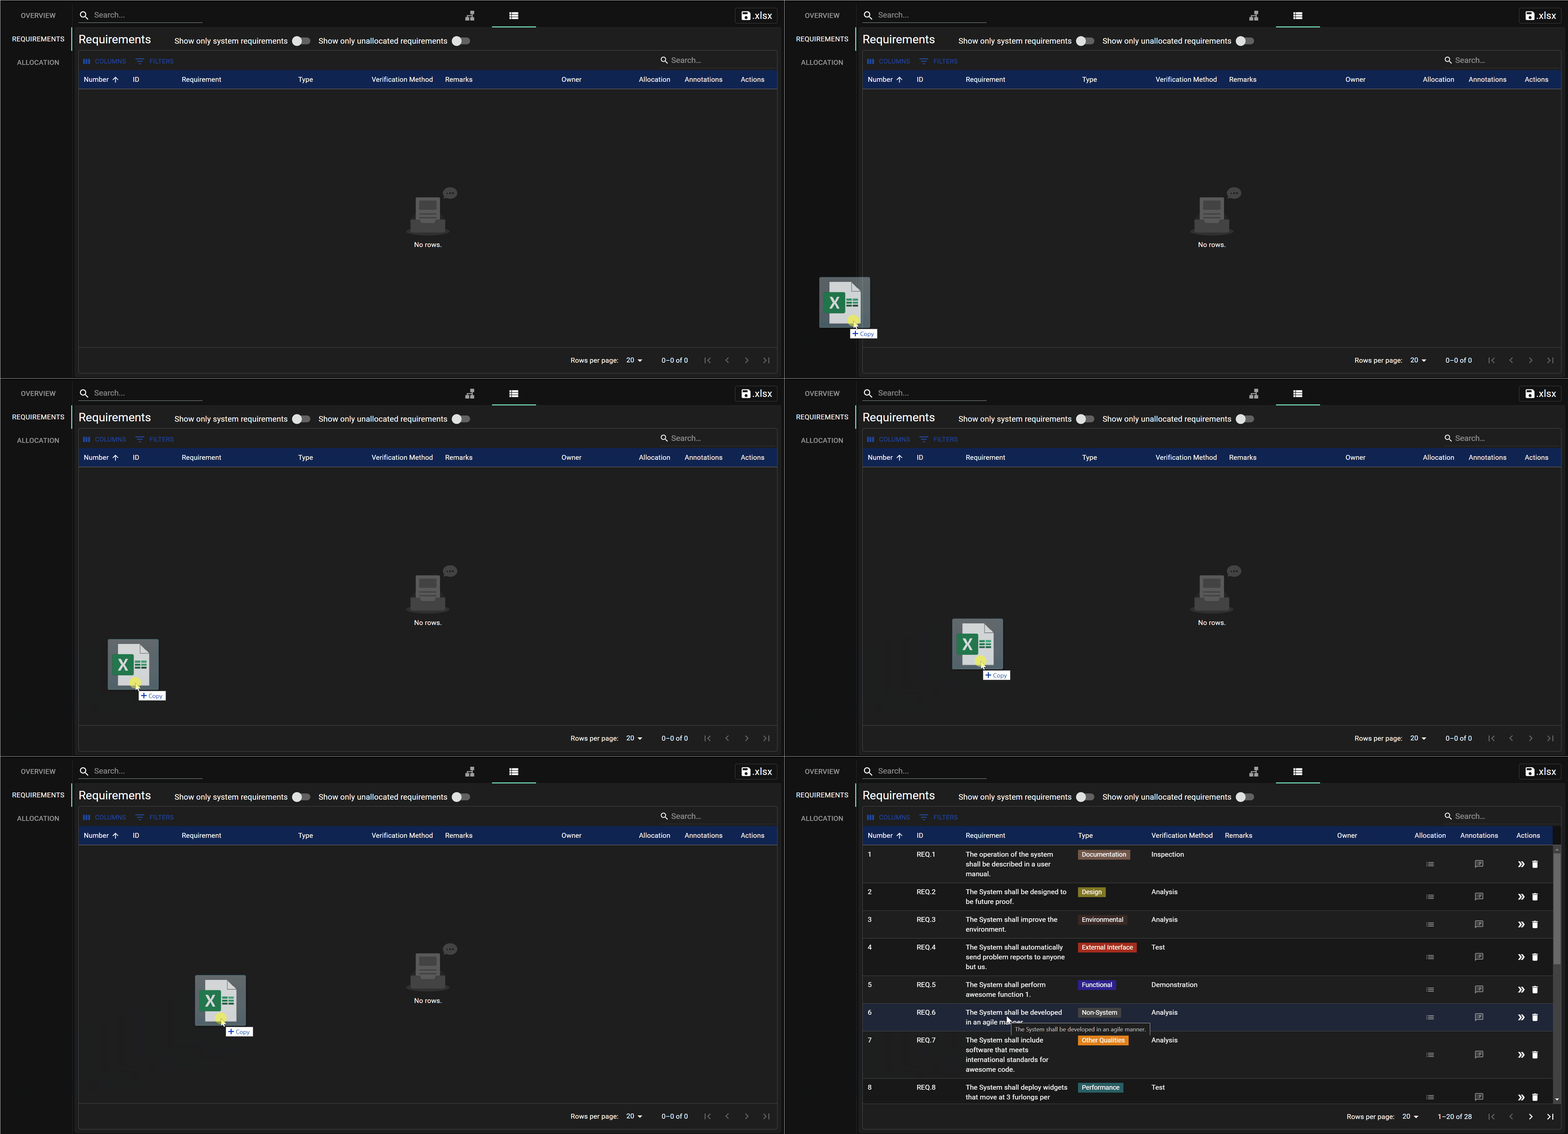
- Save the workbook and drag and drop it onto the app.
